

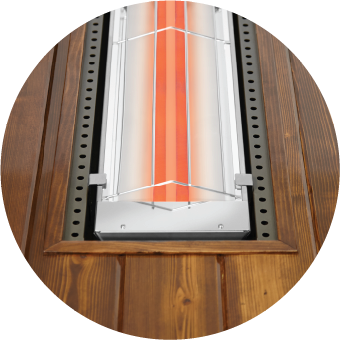
Flush mount installation from Infratech.
The Infratech flush mounting option has long been a favorite option among the architects, interior designers and engineers working on today’s most sought-after commercial and residential properties.
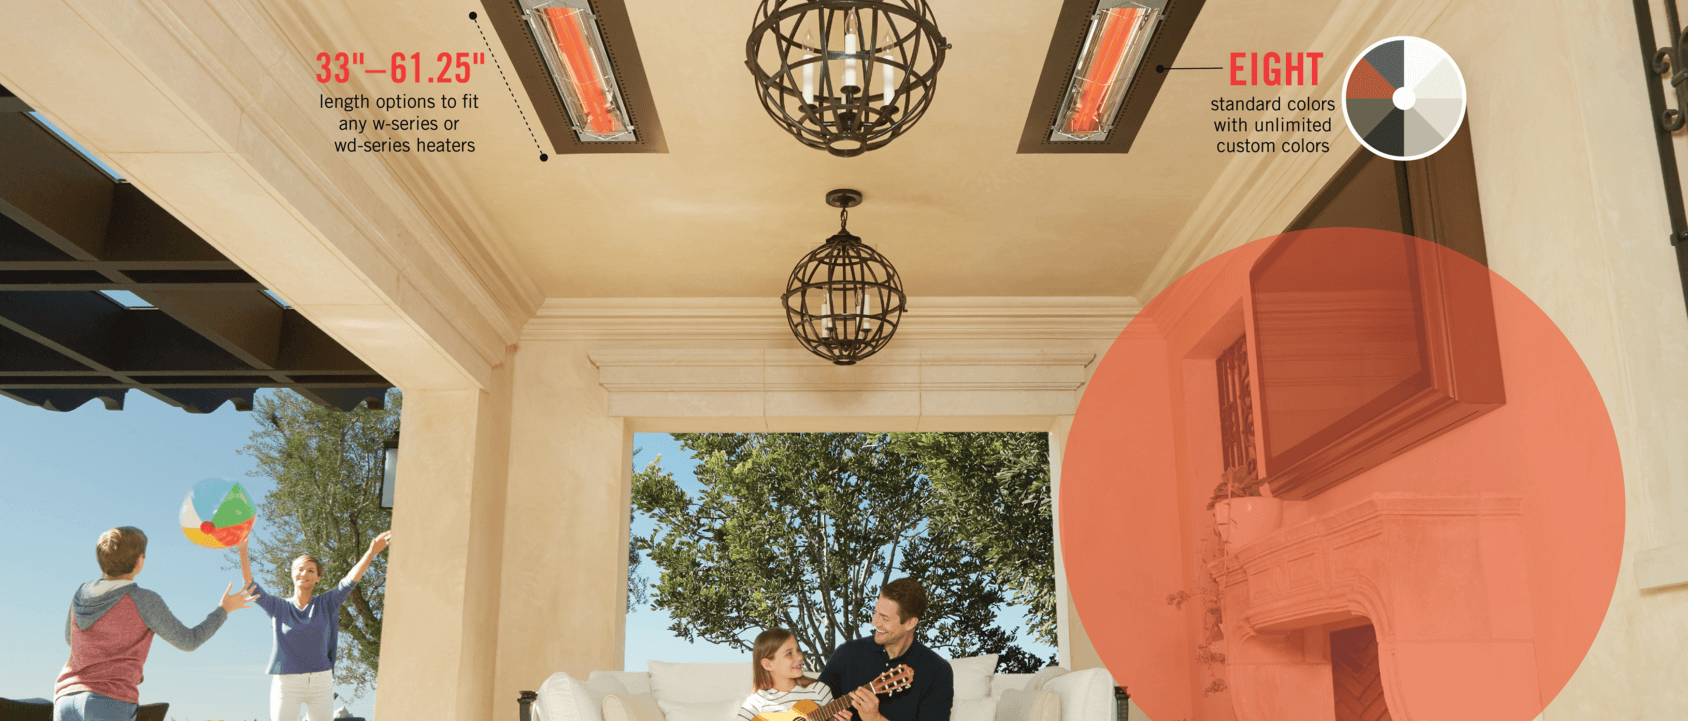
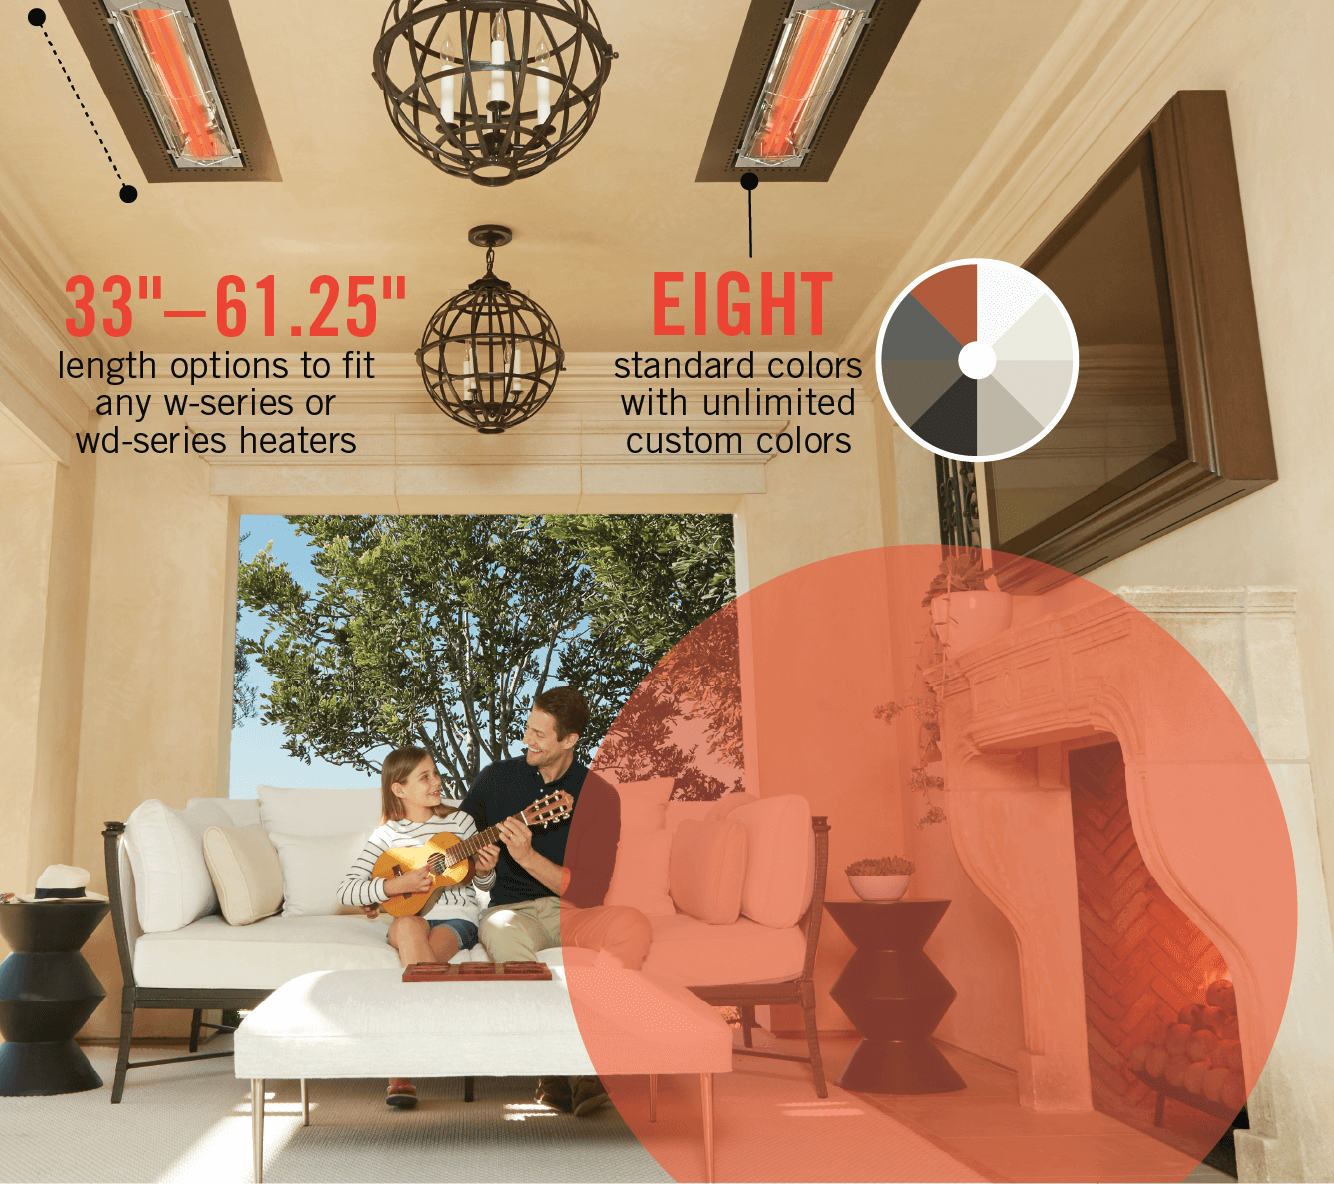
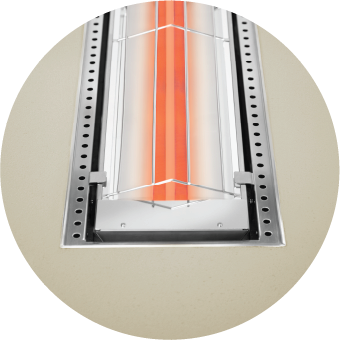
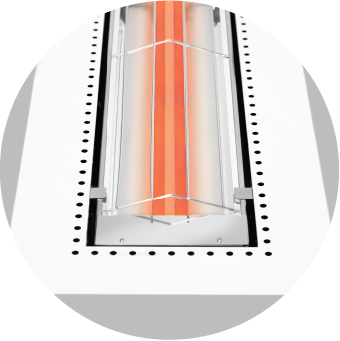
flush mounted Infratech heaters are as stylish as they are versatile.
the designer’s choice.
Our team is frequently called upon to collaborate during initial planning stages, in order to provide comprehensive, low-profile flush mounting heating solutions that blend seamlessly into a property’s décor.
Contact our technical customer support team to learn more

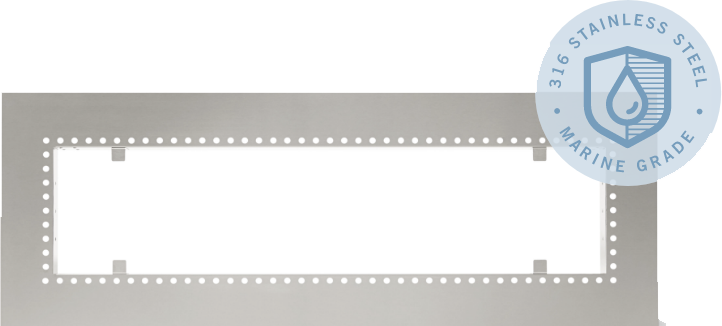
Introducing the Marine UpGrade for Infratech flush mount frames.
Now you can enjoy even longer-lasting durability for flush mount installations in climates with exposure to saltwater and other extreme elements by choosing Infratech’s new Marine UpGrade. It combines the seamless look of flush mount installation with our most durable, corrosion-resistant 316 stainless steel construction.


how to flush mount.

Must be installed into a flat ceiling, where the heater can face straight down.
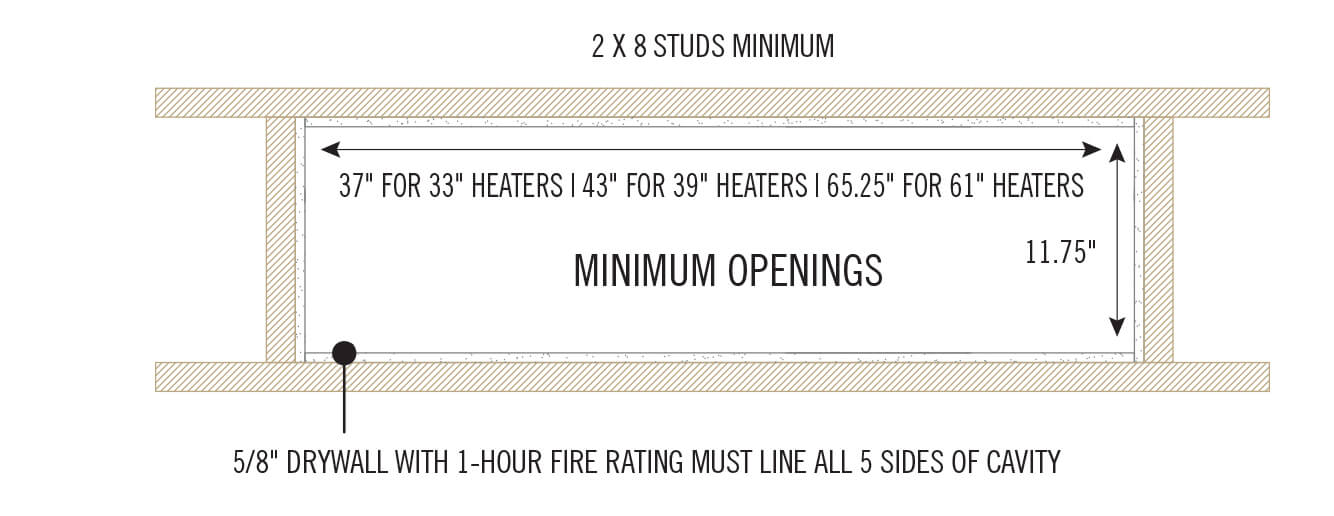
Requires minimum 2″ x 8″ studs
Licensed contractor required to complete a flush mount installation.

Avoid flush mounting the heater close to a ceiling fan or light fixture.
Slimline Series Heaters can not be flush mounted.
RECOMMENDED TO FLUSH MOUNT W OR WD-SERIES HEATERS.
Note: Infratech heaters cannot be flush mounted into a pitched or sloped ceiling.
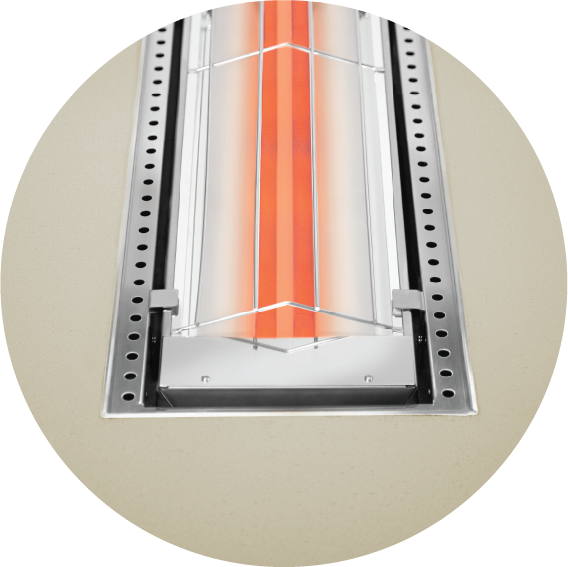
They can be installed with the edges exposed, or can be partially covered by a drywall, plaster, stucco or tongue-and-groove ceiling treatment.
 Stucco
over frame
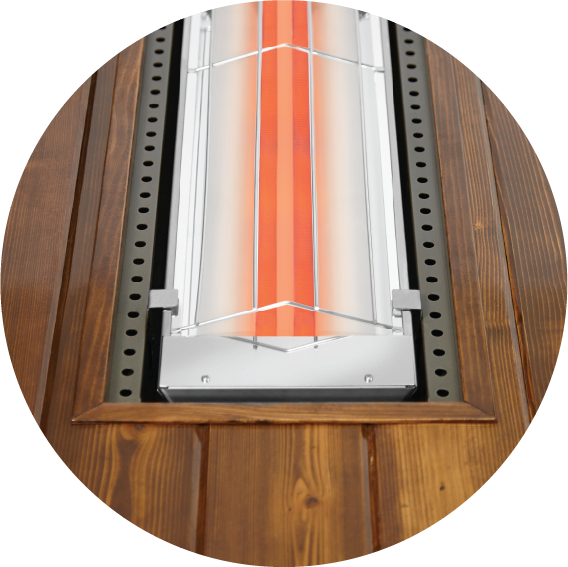
 Tongue-and-groove
over colored frame
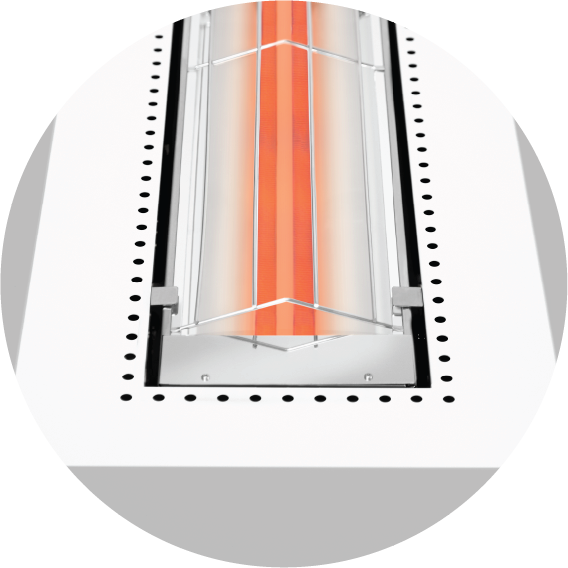
 Colored frame
over finished ceiling
FLUSH MOUNT YOUR HEATER IN FOUR SIMPLE STEPS

Frame the pocket that will house the heater with a one hour-rated fire containment box. Note: Frame and heaters cannot be mounted on a sloped/pitched ceiling.

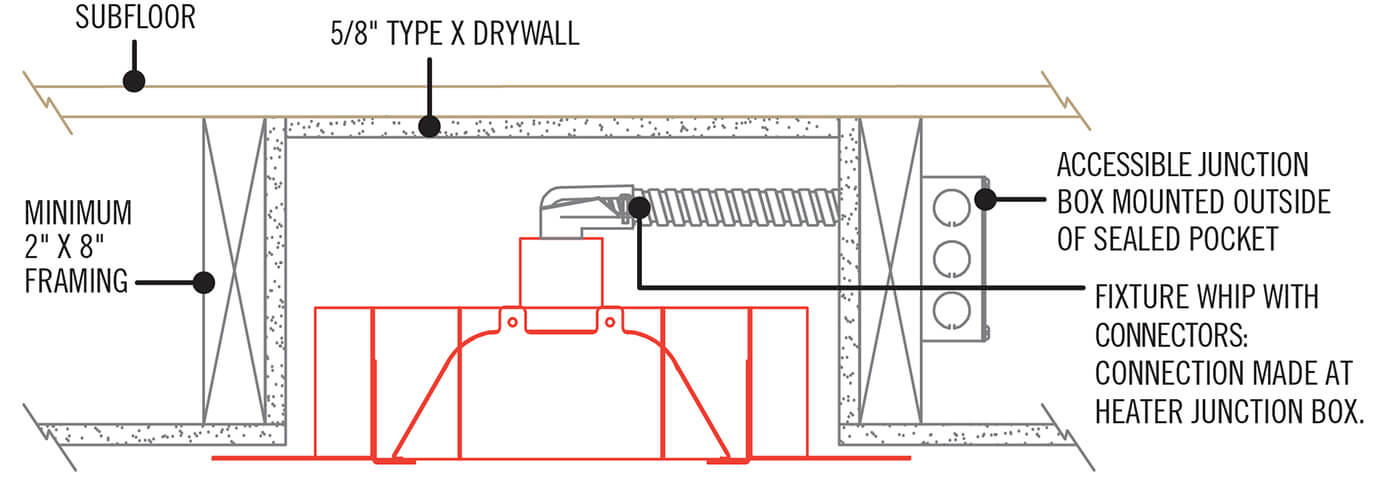
The junction box must be mounted outside of the lined pocket. You can choose to mount the junction box in a variety of locations, depending upon where you’ll be accessing it.

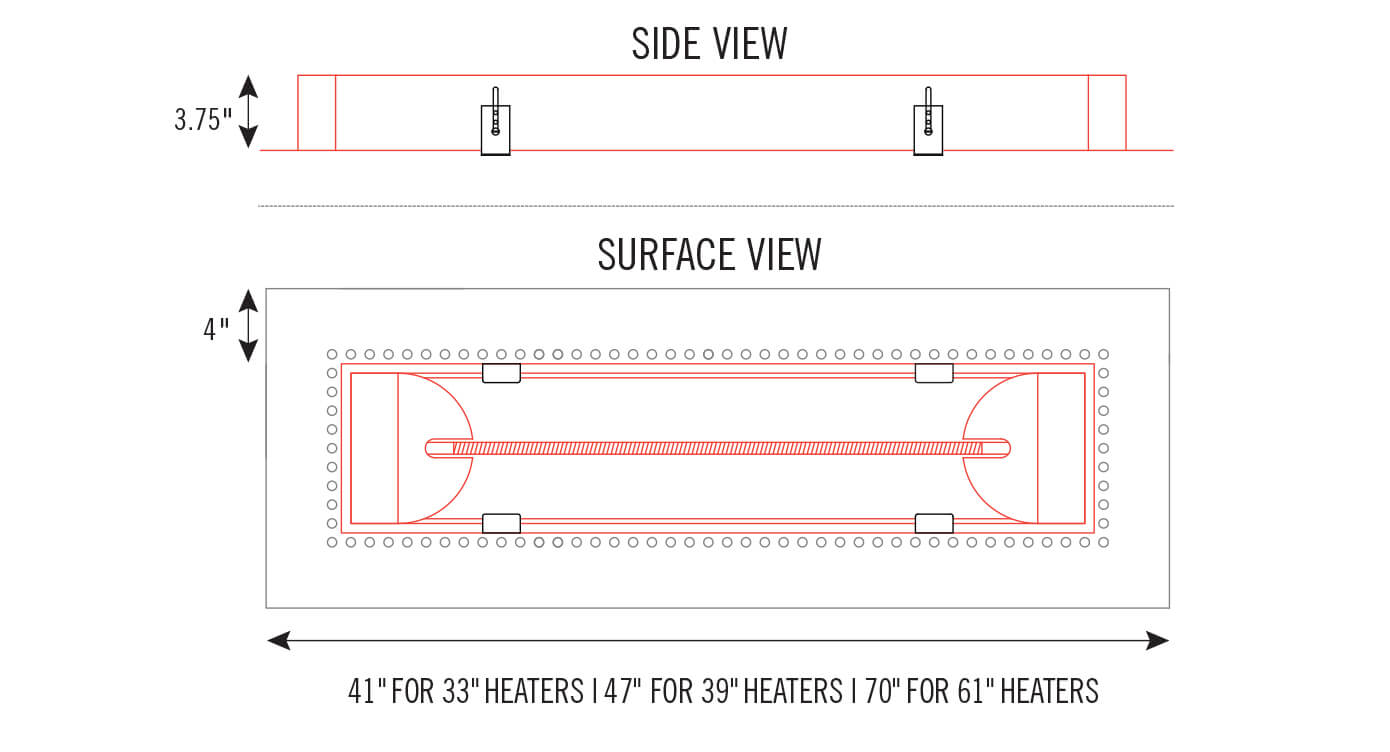
Install the frame into the finished pocket. You may choose to leave all four inches of the trim exposed, or partially cover it with a decorative ceiling (1/2″ clearance is required from ventilation holes).

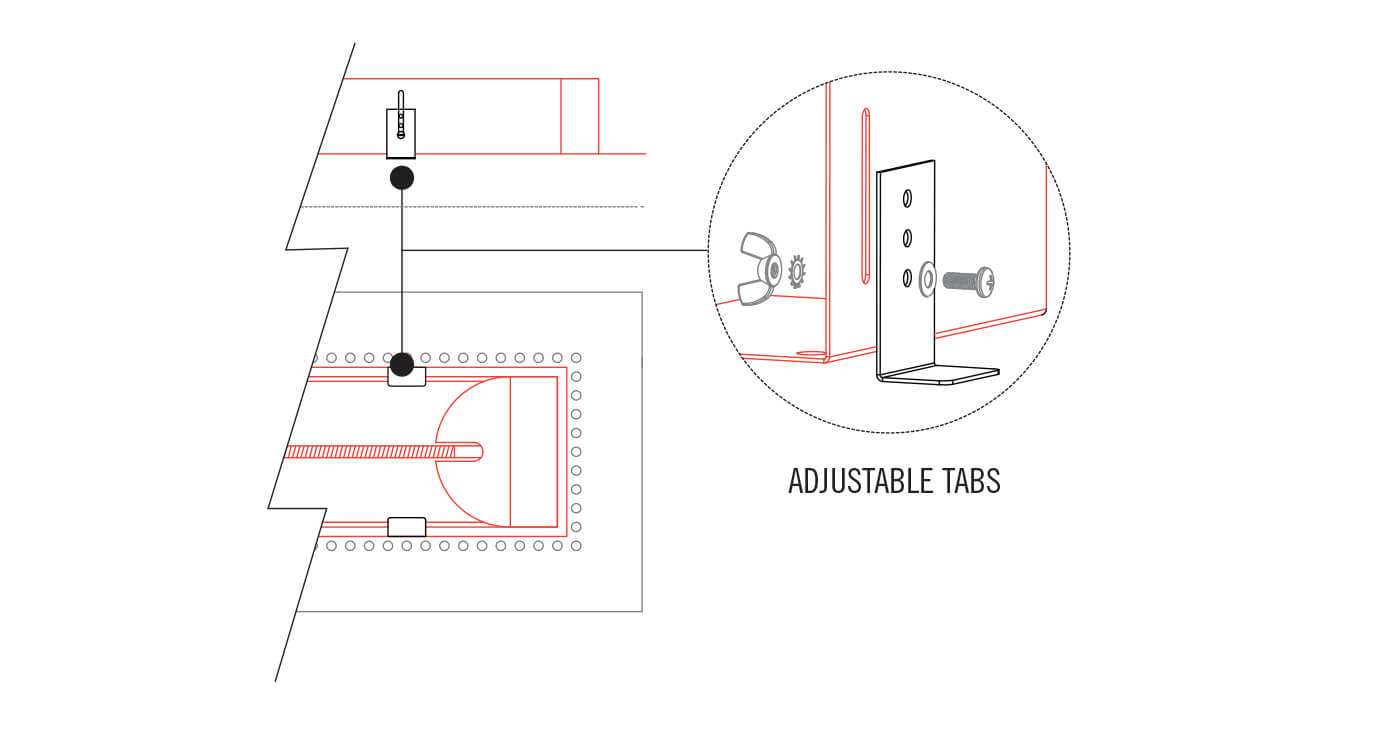
Install the heater (heater must face horizontal to the floor) and adjust the tabs to set the heater flush with finished ceiling.
WARNING: FRAME AND HEATERS CANNOT BE MOUNTED ON A SLOPED/PITCHED CEILING. FLUSH MOUNT APPLICATIONS MUST ALWAYS BE INSTALLED WITH HEATERS HORIZONTAL TO THE FLOOR ON A FLAT, NON-SLOPED CEILING.